How to install and configure RMP for Windows.
1️⃣ Install the INtime RTOS
The RMP for Windows uses the INtime RTOS to run the RMP motion and IO firmware.
- Note
- If you bought an sRMP (Industrial PC) from RSI INtime will be pre-installed and you can skip this step.
1. Download INtime
2. Run the Installer
- Note
- These next steps apply to INtime version 7. To download the older version INtime 6, proceed to the INtime 6 Installation Guide.
Some pop-ups may appear. Allow the app to make changes to your device/computer.
.png)
Click Yes to reboot the device/computer.
- Note
- You may be asked to reboot several times during the install process. Make sure any outstanding work is saved and choose Yes each time
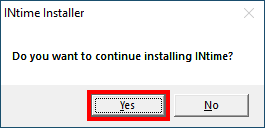
Once the computer is rebooted, click Yes to continue installing INtime.
- For the following pop-up windows, you will click "Next" a couple of times:
Install INtime 6 (Only if you are not installing version 7 already)
- Some pop-ups may appear. Allow the app to make changes to your device/computer.
- Click Yes to reboot the device/computer.
- Once the computer is rebooted, click Yes to continue installing INtime.
For the following pop-up windows, you will click "Next" a couple of times:
- Popup 1: Welcome to the INtime for Windows Runtime Installation Wizard (Click Next)
- Popup 2: (Check I accept the license) the license agreement and then (Click Next)
- Popup 3: Readme Information (Click Next)
- Popup 4: Destination Folder (Click Next)
- Popup 5: Select Installation Type: Default (Complete Runtime Installation) (Click Next)
- Popup 6: User Information: Is optional to enter your info (Click Skip)
- Popup 7: Ready to Install the Application (Click Next)
- If you are prompted with a Windows Security pop-up (click Install)
- Popup 8: INtime Runtime has been successfully installed (Click Finish)
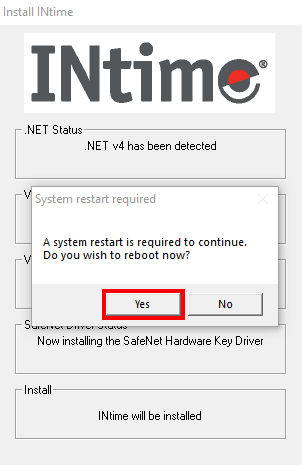
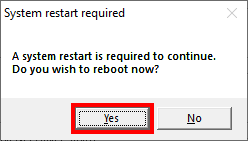
- Popup 9: System restart required (Click Yes) to reboot the device.
🔹 3. License INtime
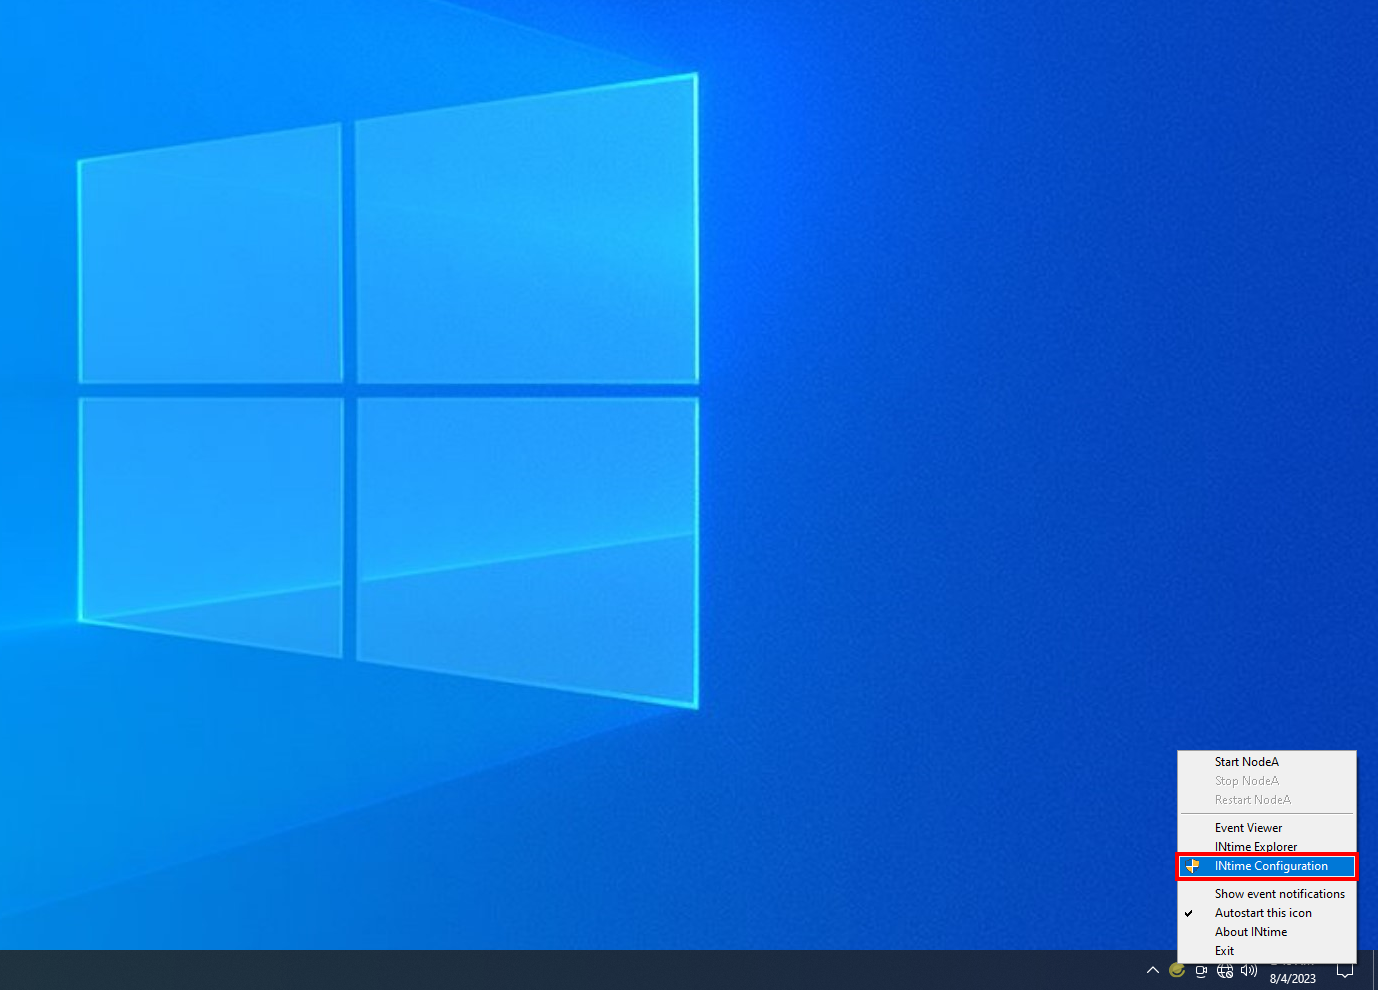
- Open (C:)>Program Files1 (x86)>INtime>bin>inconfig.exe or open on the Start Menu under INtime, and as a yellow tray icon.
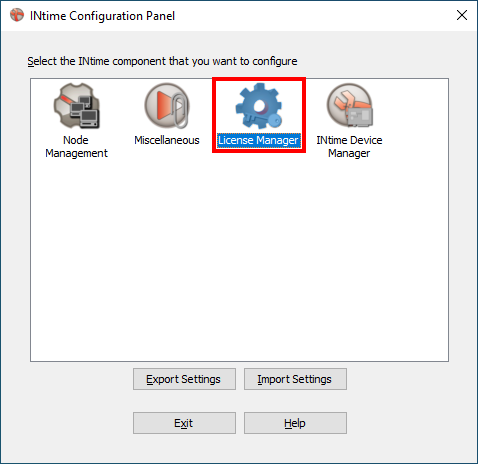
- The INtime Configuration Panel will open. Double-click to open the License Manager.
- The "LicMan" dialog will appear asking if you want to activate it over the Internet. Click NO.
- The License Management dialog will appear. There are two ways to add a license:
Option 1: From USB Hardware Key
- Locate the USB Hardware key and insert it into an available USB port (RSI Industrial PC comes with the USB dongle pre-installed)
- Included in the USB hardware key package, there should be a card with a 30-digit license code (License code for this USB Key:).
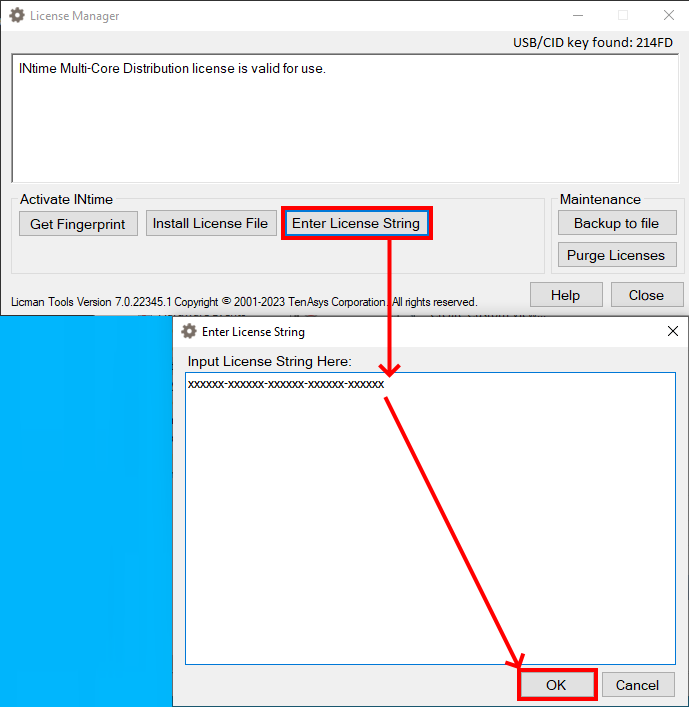
- Click the “Enter String” button.
- Enter the 30-digit code (with or without dashes) into the box and click OK.
Option 2: From File
- Download the *.lic file attached to our email and add it using the INtime License Manager.
- Verify the License was successfully installed. It will show up in the Installed Licenses box. Click OK.
- A message should pop up saying that the INtime kernel Manager service must be restarted to use the new license. Click Yes.
🔹 4. Configure INtime
Proceed to the RMP INtime Configuration Section. The same steps apply for INtime 7 and 6.
3. License INtime
Select the tab below that applies to you:
- Customer
Move INtime to your system trays always visible section (OPTIONAL)
.png)
Right-click the INtime system tray icon and launch (INtime Configuration)
Launch the (License Manager)
If your INtime dongle is plugged in your license might be automatically detected (Click Yes)
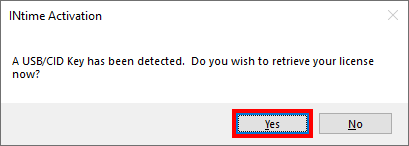
- Note
- Your INtime dongle must remain plugged in whenever you want to use INtime/RMP
If your license fails to activate after automatic detection, enter your License String manually.
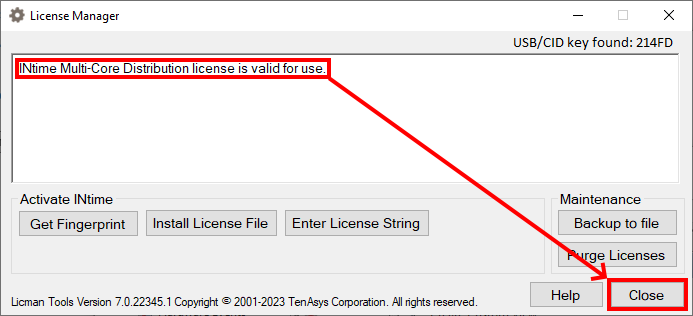
If activation is successful you could be able to see "valid for use" (Close the License Manager)
- Evaluation User (30-Day)
Open INtime Configuration (from tray icon)
.png)
- Click the item License Manager
- Click the button Enter String
- Enter the license string provided by RSI and click the OK button
4. Configure INtime
For the RMP to run correctly certain INtime settings must be configured.
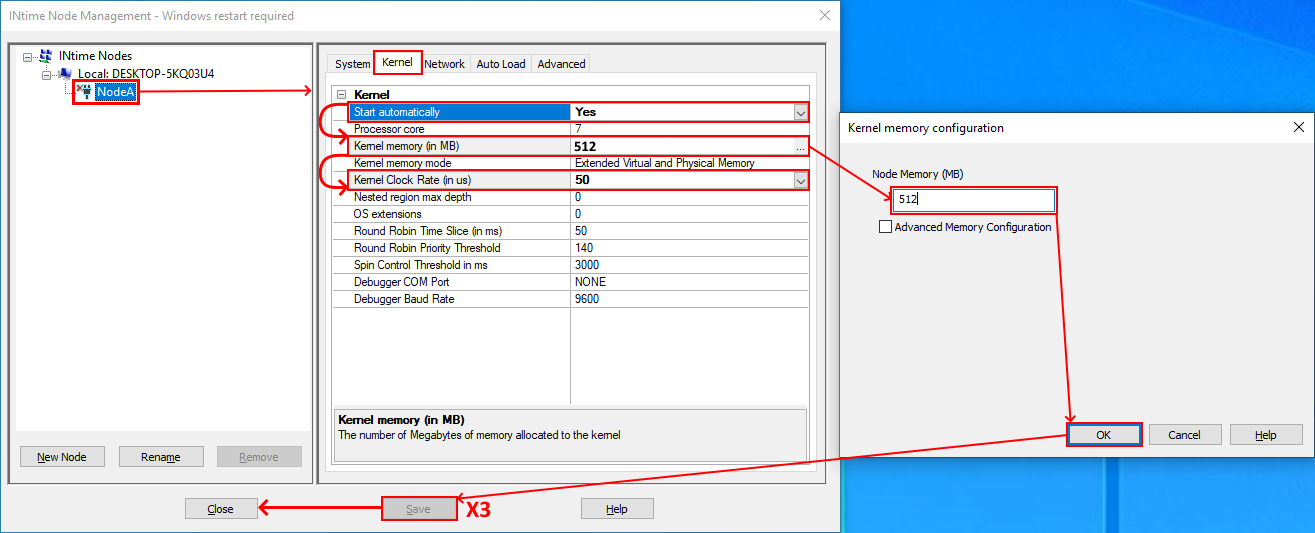
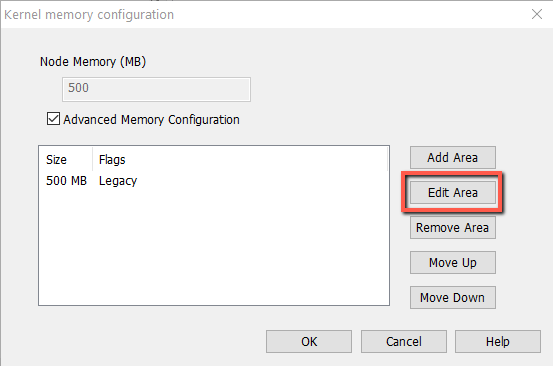
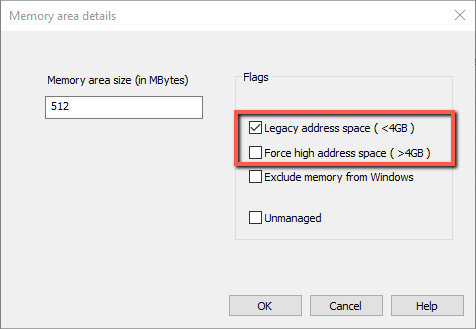
🛑 If you encounter the error -> Failed to allocate memory 512 MB
%20(1)%20(1)%20(1).png)
If you encounter the error: Failed to allocate memory on Legacy
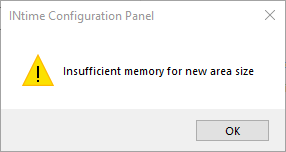
- Check Force high address space (>4GB) instead.
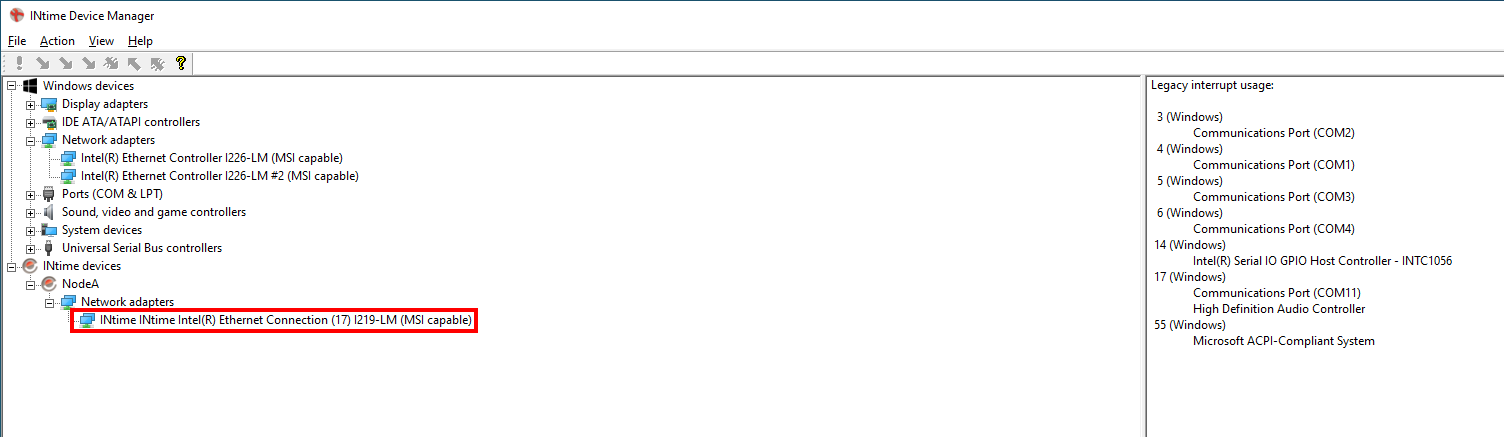
5. Pass your "NIC" to INtime
Right-click the INtime system tray icon and launch INtime Configuration
- Click on the INtime Device Manager item
- In the tree view, expand Windows devices, then expand Network adapters
- Select any available NIC (Make sure it is compatible with INtime, See compatible NICs)
- Right-click on the NIC, then select Pass to INtime using MSI
Click ❗ to confirm your changes
.png)
- Close the INtime Device Manager
Reboot by clicking Yes
Check the INtime Device Manager to confirm NIC was passed successfully
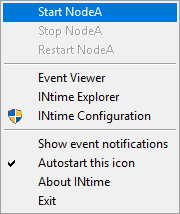
6. Start INtime
On Windows, in the bottom right menu, click the INtime icon under INtime (The yellow tray icon) (see image below).
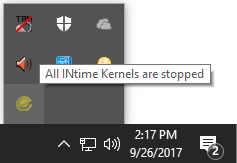
If the icon is NOT red, click Start NodeA to start INtime.
✅ The INtime RTOS should be installed. You can now test your PC's real-time performance. See RMP PC hardware and performance requirements.
2️⃣ Install the RMP Motion Controller
After you have installed the INtime RTOS correctly, you can now proceed to install the RMP EtherCAT Motion Controller.
1. Download RMP
- Navigate to our downloads page in the portal.roboticsys.com and download the latest RMP release.
Run (double-click) the downloaded installer file.
.png)
🛑 If you encounter the error -> Windows protected your PC
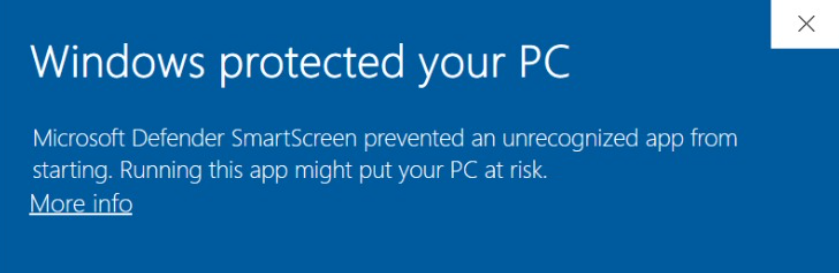
- Click "More info"
- Select "Run anyway"
Once the installer window opens, go through the installation wizard steps:
.png)
- Page 1: Welcome to the RMP Setup Wizard (Click Next)
- Page 2: End-User License Agreement (Read, check "I Accept", and click Next)
- Page 3: Destination Folder (We default to
C:\RSI\. Click Next)
- Page 4: Ready to install the RMP X.X.X (Click Install)
- Some pop-ups may appear. Allow the app to make changes to your device/computer.
Click Finish
.png)
✅ The RMP Motion Controller should be installed.
3️⃣ Install the RapidSetupX Tool
- Navigate to our customer portal: https://portal.roboticsys.com
- Log in with your RSI approved and authenticated email.
- Navigate to the Downloads tab.
- From the Tools section, download the latest RapidSetupX in the Windows column.
- Navigate to the folder where the RapidSetupX .zip has been downloaded (most often Downloads)
- Right click and select Extract All...
- Choose a destination folder or select Browse... to find a place for one, then choose Extract
- Double click RapidSetupX.Windows.exe to open. You should see a window like the one shown below.
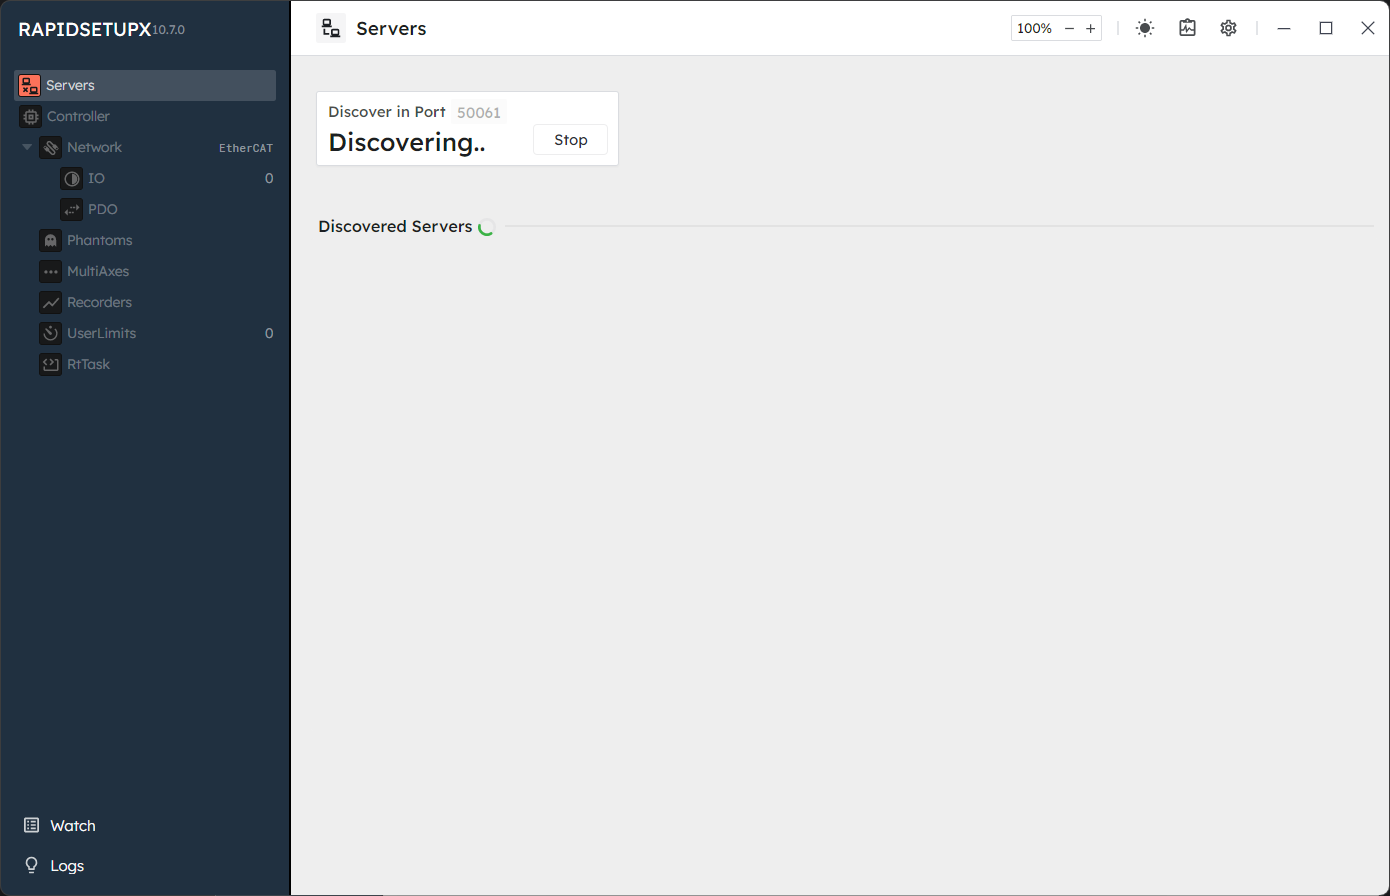
✅ RapidSetupX is now installed.
.png)