|
|
APIs, concepts, guides, and more
|
|
|
APIs, concepts, guides, and more
|
How to install and configure RMP for Windows.
The RMP for Windows uses the INtime RTOS to run the RMP motion and IO firmware.
Run (double-click) the downloaded installer file.
.png)
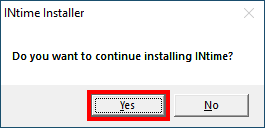
Some pop-ups may appear. Allow the app to make changes to your device/computer.
.png)
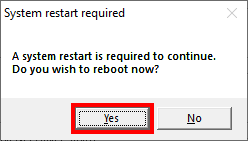
Click Yes to reboot the device/computer.
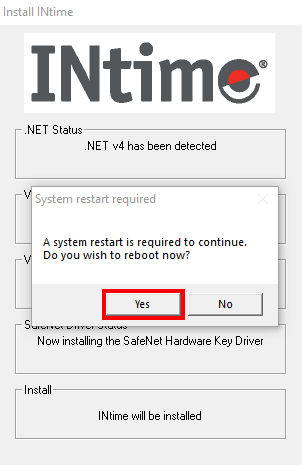
Once the computer is rebooted, click Yes to continue installing INtime.
Popup 8: System restart required (Click Yes)
For the following pop-up windows, you will click "Next" a couple of times: 🔹 3. License INtime Option 1: From USB Hardware Key Option 2: From File 🔹 4. Configure INtime Proceed here. The same steps apply for INtime 7 and 6.
Install INtime 6 (Only if you are not installing version 7 already)
(C:)>Program Files1 (x86)>INtime>bin>inconfig.exe or open on the Start Menu under INtime, and as a yellow tray icon.
Select the tab below that applies to you:
Move INtime to your system trays always visible section (OPTIONAL)
.png)
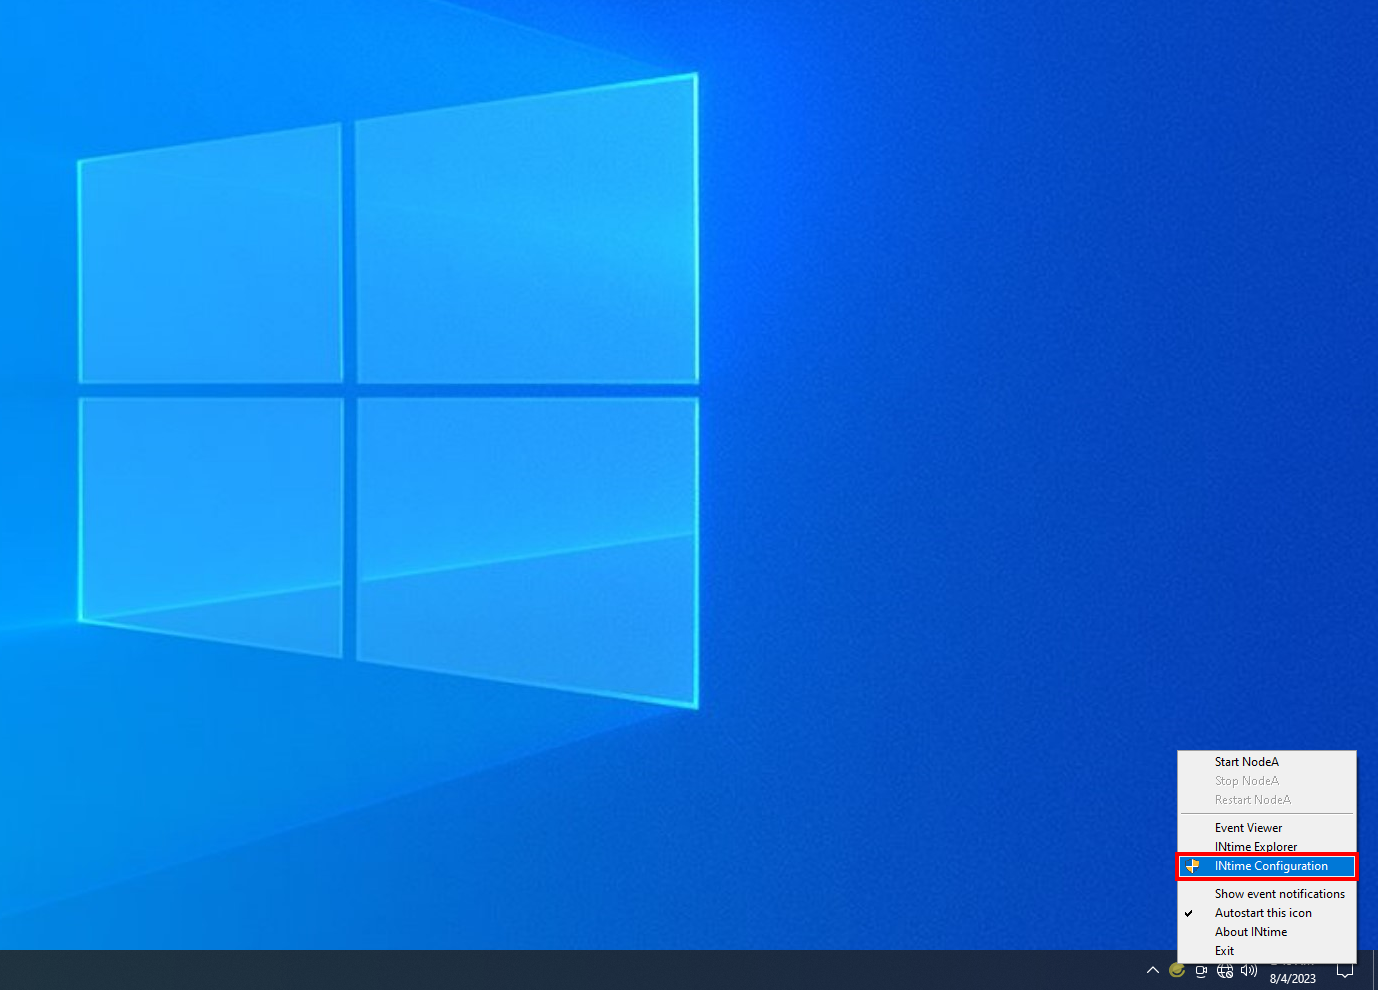
Right-click the INtime system tray icon and launch (INtime Configuration)
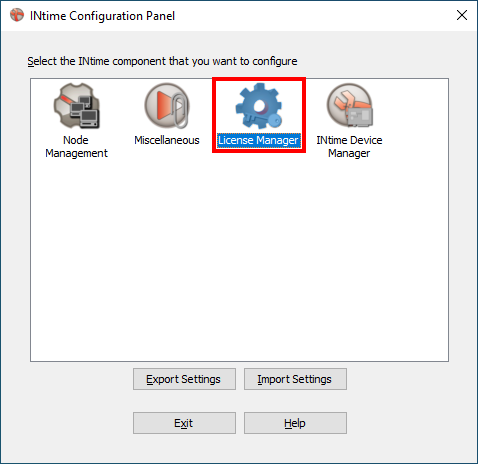
Launch the (License Manager)
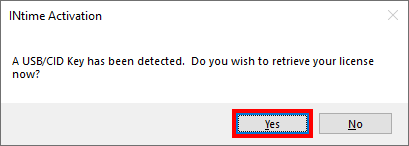
If your INtime dongle is plugged in your license might be automatically detected (Click Yes)
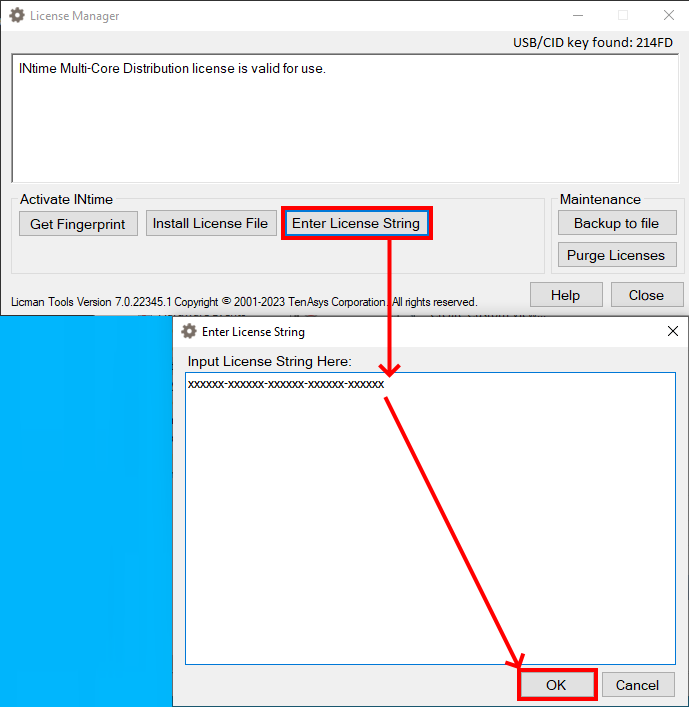
If your license fails to activate after automatic detection, enter your License String manually.
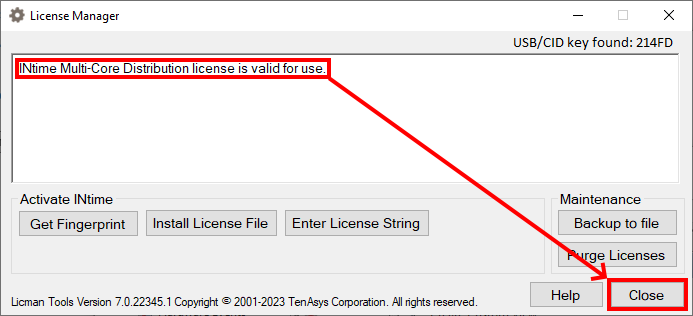
If activation is successful you could be able to see "valid for use" (Close the License Manager)
.png)
Enter the license string provided by RSI and click the OK button
For the RMP to run correctly certain INtime settings must be configured.
Right-click the INtime system tray icon and launch (INtime Configuration)
Node Management itemNodeA from treeview itemsKernel tabKernel Clock Rate → 50
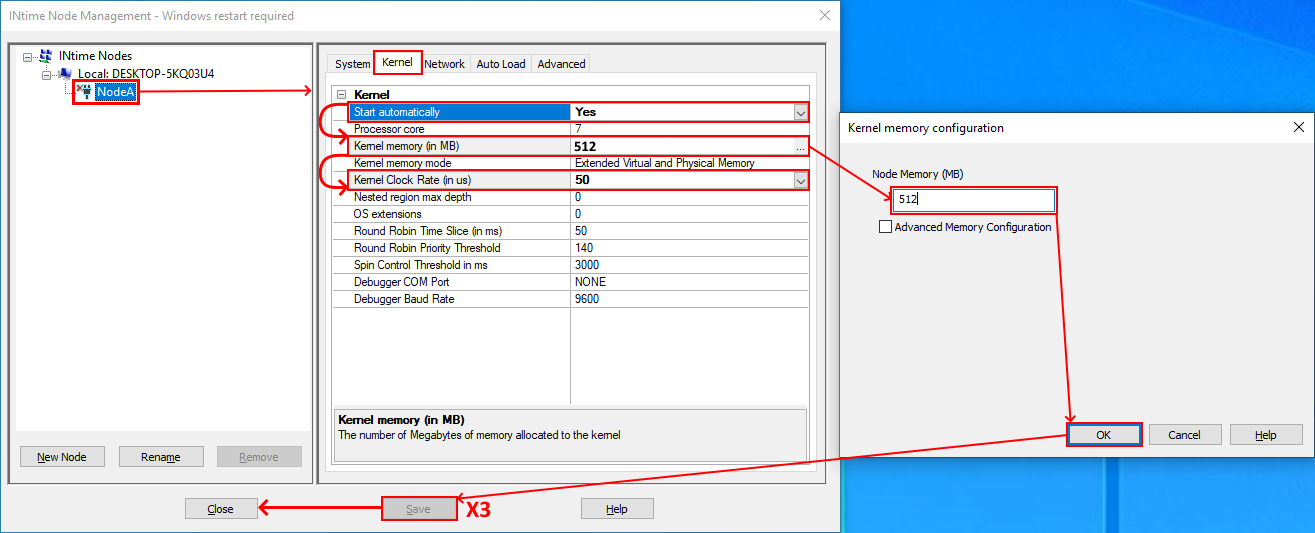
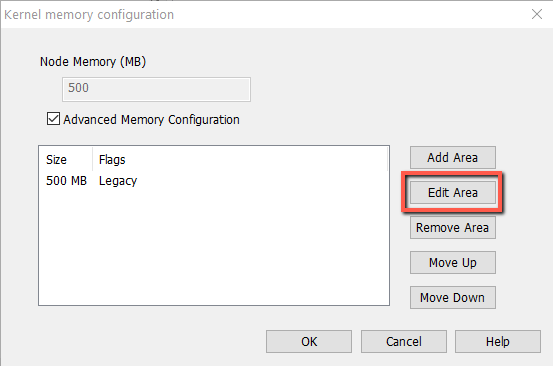
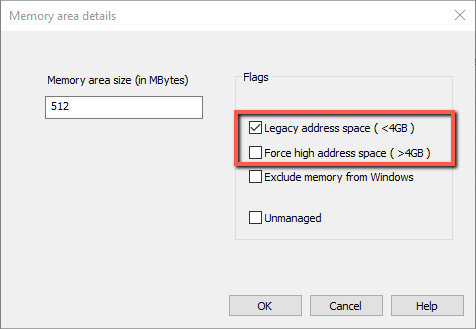
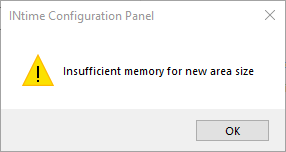
Check the Advance Memory Configuration checkbox and click the Edit Area button. Select Force High for systems with more than 4 GB of physical RAM installed. If you encounter the error: Failed to allocate memory on Legacy Check Force high address space (>4GB) instead.
🛑 If you encounter the error -> Failed to allocate memory
512 MB
%20(1)%20(1)%20(1).png)
Right-click the INtime system tray icon and launch INtime Configuration
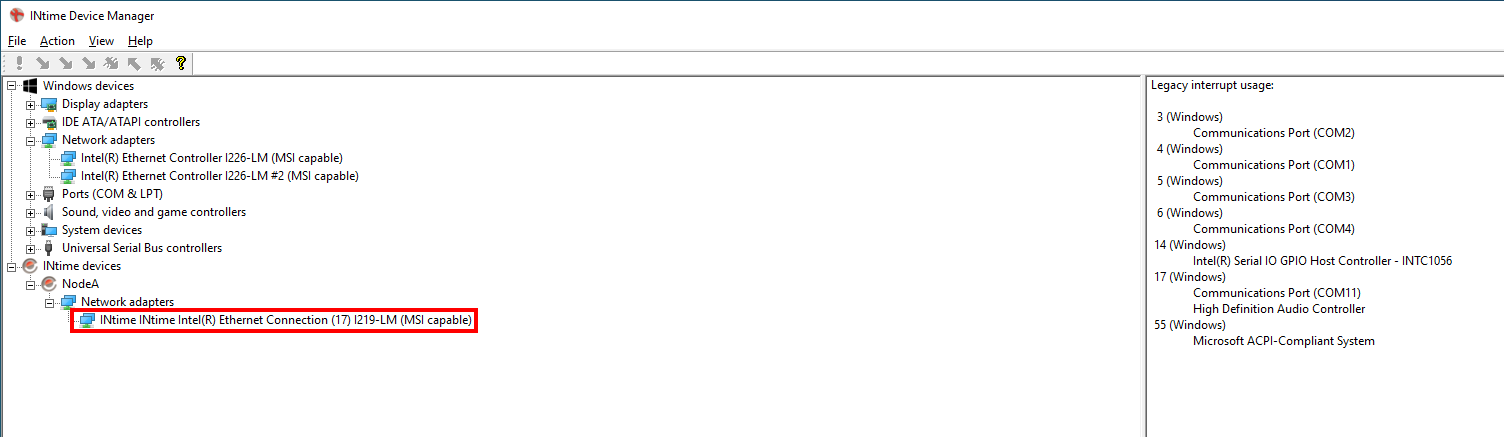
INtime Device Manager itemWindows devices, then expand Network adaptersPass to INtime using MSIClick ❗ to confirm your changes
.png)
INtime Device ManagerReboot by clicking Yes
Check the INtime Device Manager to confirm NIC was passed successfully
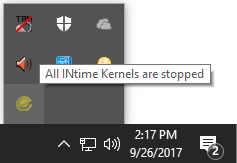
On Windows, in the bottom right menu, click the INtime icon under INtime (The yellow tray icon) (see image below).
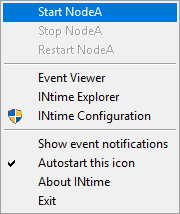
If the icon is NOT red, click Start NodeA to start INtime.
✅ The INtime RTOS should be installed. You can now test your PC's real-time performance. See RMP PC hardware and performance requirements.
After you have installed the INtime RTOS correctly, you can now proceed to install the RMP EtherCAT Motion Controller.
Run (double-click) the downloaded installer file.
.png)
Once the installer window opens, go through the installation wizard steps:
.png)
C:\RSI\. Click Next)Click Finish
.png)
✅ The RMP Motion Controller should be installed.