|
|
APIs, concepts, guides, and more
|
|
|
APIs, concepts, guides, and more
|
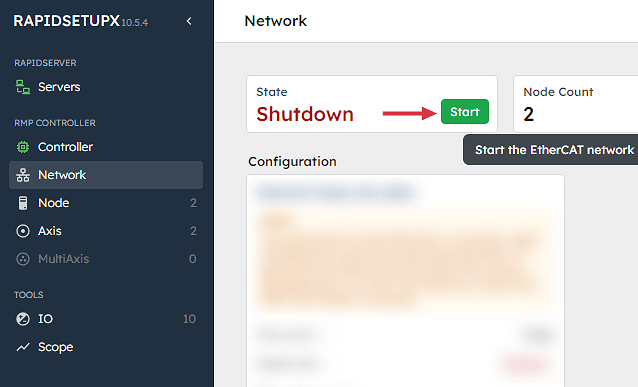
Guide on how to start the network with RapidSetupX.
Starting the network will allow you to communicate with physical EtherCAT devices in RapidSetupX.
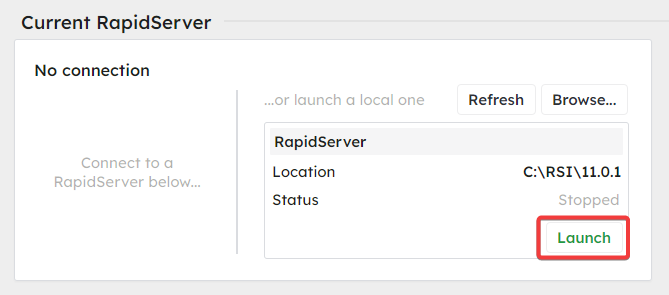
On Windows, you can start and connect to a RapidServer with the "Launch" button
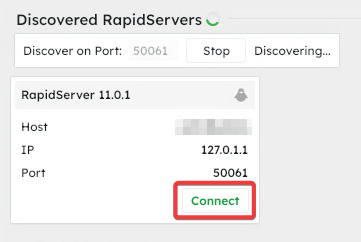
On Linux, your RapidServer should be running automatically. Connect to it in the Discovered RapidServers section
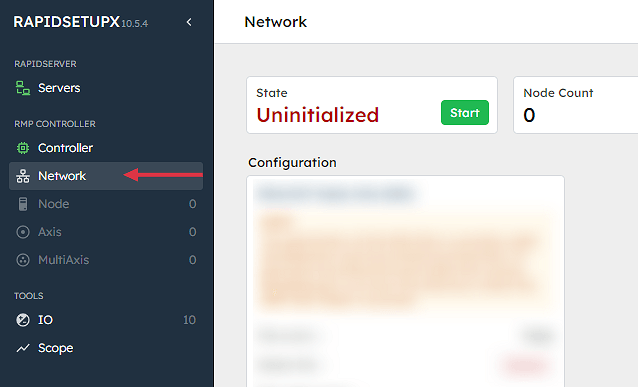
Navigate to "Network" page
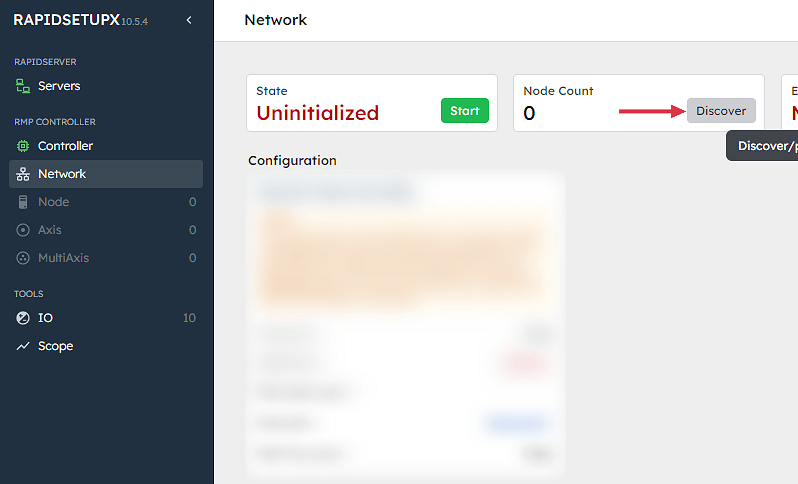
Click "Discover"
On Linux, run the command:
sudo rsiconfig -eni --cpu-affinity X --primary-nic XXXXXX before clicking discover, where X is the isolated CPU core and XXXXXX is the Primary EtherCAT NIC.
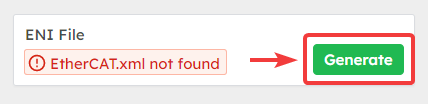
Click "Generate"
This creates the ENI file, allowing you to start the network.
You will need to re-generate this file every time the devices connected to your EtherCAT network change.
Click "Start"
Start the network to make your axes and nodes visible.